Tuesday, December 29, 2009

Around Our House: Christmas Favorites


Over the years, I have amassed a fairly large collection of ornaments. My own tree started my second year of college when I purchased a 3' tree on clearance. That year I made all of my own decorations using copper (wire and sheets that had come from an estate sale) and metallic raffia. I also made a long strand of Fimo beads that has long since disappeared. This is also the same year I made the first two stockings.


This is the whole set. The first two belong to Scott and I (the two in the middle).


Beatrice's stocking won Best of Show at the Iowa State Fair in 2008. I couldn't have been happier. I saved fabrics for over ten years so our family stockings would match.

Through college I collected unique or weird ornaments whenever I found them. I like to catch end of season clearance sales, but have been know to pay full price.


Is it a dog? Is it a flocked dog with plastic tree branches coming out of its head? No. It is a reindeer. Obviously. Found at Calipso in Valley West Mall 2009


Last year's addition to our creepy snowman collection. While this one isn't particularly creepy, it is covered in glitter and fabulous. Found at Porch Light 2008


This one was so weird it had to come home with me. And if I remember correctly, it came from Target in 2007.


Santa Cop. Nothing says Christmas like getting busted by a billy club wielding Santa. Found at Hobby Lobby 2007


When I was in college, my grandma Louise started the tradition of allowing each of us to select one ornament from the tree each year. I have such strong memories of the ornaments from her tree. A few of my favorites were the little plastic horns (that made noise), the tiny fairy tale books, and all of the ornaments made by my grandma and her friends for the church craft bazaar over the years.


This set of bells came from grandma's tree.


When I was in Los Angeles, Grandma sent me this old ceramic bell that used to be on her tree when she was a little girl.


Since I spend quite a bit of time at craft shows during the holiday season, I have found a number of spectacular handmade ornaments to add to my collection.


This one is made by Skirt. A couple of crafty gals out of Iowa City.


This sweet pinecone was made by Danelle of Monster Fashion

My greatest resource for ornaments has come from my children. I like to spend time each year making ornaments with them. The first year, we used self sticking laminating paper to cover images that we hole punched and hung from strings. Last year, we painted a lot of pre-made ornaments from craft stores. But this year, we made the most fabulous pipe cleaner ornaments. I had the girls both draw faces on circles that we cut out and glued on as heads. The girls then chose doodads for each person to hold. As you can see they turned out amazing!


Made with Sylvia in 2008. I helped to sew the chunk of serger scraps she found on top.


Made with Beatrice 2009. She is just starting to draw faces, for this project, she enjoyed gluing plastic eyes to her colored faces.


Made with Sylvia 2009. Sylvia did such an amazing job drawing faces. This snowman is one of my favorites. I particularly love the carrot he is holding.


Another of Sylvia's. This one is an angel. The idea for this project came from a fun shop on etsy (from whom I purchased three sets of ornaments) Old World Primatives She uses great vintage images atop her lovely ornaments.

In a few days, we will pack up the tree. Each ornament will be carefully packed away so that someday they might grace the trees of my own children and grandchildren. Another great pretty Christmas gone by...

Thursday, November 26, 2009

Around Our House: Thanksgiving 2009


Happy Thanksgiving!

So I have escaped the basement momentarily to host Thanksgiving for our third year. Grandma Louise was kind enough to allow us the honor : )

Shockingly, I just went outside to pick a fresh arugula garnish for our turkey platter!

This year I am keeping with traditional recipes for the sake of time and sanity. I am making the turkey, stuffing, squash, green beans with bacon, pumpkin pie, custard pie, corn on the cob, apple pie (one two crust and one with an amaretti cookie topping, and a tasty selection of pickles from the garden. We grew the squash and beans, and the turkey, apples, bread, eggs, milk, and corn are all produced locally.

I have to skip dinner at my aunt's house to work on orders this year. But it'll be worth it to feel caught up!

Friday, October 02, 2009

Around Our House: Clean that Toilet!

Best Toilet Cleaner EVER!!!!

Ok so this might not excite most as much as it does me, BUT, I have discovered the best toilet cleaner ever.

With two small children who refuse to flush or sleep through a flushing toilet, our toilet can get some pretty gross stains. I hate using harsh chemical cleaners, both environmentally, and because I am afraid the kids will get some on them if they use the toilet while I am waiting for the cleaner to work. But nothing makes me sadder than a nasty stink potty. SO here is my technique for perfectly clean potties.

Turn off the water at the valve. Flush the stool. If the water level is low then you are good to go. I often have to don some rubber gloves and scoop out a little of the excess water. Pour about a third of a gallon of distilled white vinegar and allow to sit for an hour. Using a toilet brush, scrub away the yuck. For super stubborn stains, I have let it sit for another hour and then gone at it again. If you are REALLY brave and need to hurry the process, a Mr Clean magic eraser will take it right off. Like Magic. Turn your water back on and flush away all your troubles.

For stinky toilets that just need freshening, pour a half a cup of Borax (found in the laundry aisle) and swish with a brush. Allow to sit for an hour (or overnight).

Note that if you pour vinegar and borax in the toilet together, you may create a volcano. Borax is similar to baking soda.

Sunday, August 16, 2009

Recipes: Grandma Louise's Chili Relish

Grandma Louise's Chili Relish

It takes a lot of tomatoes, and a good 8 hours to cook down, but it is worth every minute of effort. My grandma Louise has been making chili relish since before I was born. She always served it with hamburgers, but I've found it to be great with hot dogs, meatloaf, sandwiches, and my favorite homemade black bean patties.

The recipe for the Chili Relish is copied directly from grandma's own recipe card. The recipe for the black bean patties is one I developed in college.

Chili Relish

18 tomatoes (skinned, cored, seeded, and roughly chopped)
2 green peppers (roughly chopped)
2 medium onions (roughly chopped)
1 1/2 C sugar
2 C white vinegar
2 t salt
1 t ground cinnamon
1/2 t ground cloves
1 t allspice

In small batches, finely chop the tomatoes, onions, and peppers in a food processor. Put in a large heavy pot* and add the rest of the ingredients. Allow the mixture to simmer for approximately 8 hours. When the relish is finished, it will be the consistency of ketchup and will have cooked down to about 1/4 of the original mixture.

When the mixture is nearly finished cooking, sterilize half pint jars and lids. Spoon the mixture into the jars, and seal (process in a water bath for 20 minutes).

Makes around 8 1/2 pints


Here is the chili relish when it is finished. You can see how full the pot was in the beginning. The key to this recipe is slow patient cooking.

* Grandma Louise always makes a double batch and uses her roaster set on low. Patience is key.

Black Bean Patties

1 1/2 C cooked bean beans (or one can)
1/2 C Quick Oats
1 t fresh oregano (or 1/2 t dried)
1 clove chopped garlic
2 T Olive Oil
salt and pepper to taste
5T olive oil (for cooking)

Mash the beans into a smooth paste with a hand mixer or a potato ricer. Add the oatmeal and spices. The mixture will be slightly crumbly. Add the olive oil. The mixture should have the consistency of a stiff dough. Form the dough into patties that are about the size of a hamburger and about 3/4 inch thick.

In a non-stick skillet, heat 5 T olive oil over medium heat. Brown the patties on both sides for about 5 minutes each. As the patties cook, it is useful to press down slightly on each side.

Serve on a bun with Homemade Chili Relish!

Serves 4

Saturday, August 15, 2009

Around Our House: Growing Italian Stuffing Tomatoes

Here are a few pics of one of the more unusual tomatoes we are growing this year. It is an Italian Stuffing Tomato. It's mostly hollow (a lot like it's cousin the pepper), and has a very meaty texture. I've been hollowing them out and putting them in the deep freeze to make lovely baked stuffed tomatoes this winter. I'll post a recipe when I feel like turning on the oven again.


The outside is a lovely red with orange streaks.


Here is the inside after having been scooped out.

Wednesday, August 12, 2009

Recipes: Sesame Almond Coleslaw

Sesame Almond Coleslaw

Growing up, I always hated coleslaw. Once I discovered alternate ways to dress cabbage, I learned that coleslaw is one of my favorite summer dishes. It is high in vitamin C and fiber, and light enough to go with just about anything.

This is my recipe for a light slightly sweet coleslaw that works well as a side dish, or is fabulous topped with a grilled chicken breast and served as a main course.

The last meal I served with this coleslaw was a marinated minute steak with sauteed peppers and tomatoes. Delicious!


Sesame Almond Coleslaw

1 small head of green cabbage
1 T toasted sesame oil
2 T rice vinegar
2 T honey
1/4 t garlic powder
1 small red onion thinly sliced
1/2 C dry toasted unsalted sliced almonds
salt and pepper to taste

Slice the cabbage into thin slices. In a small bowl, mix together the oil, vinegar, honey, and garlic powder. Toss together the cabbage, onion, almonds, and dressing. Salt and pepper to taste.

Serves 4-6 as a side
or
2-4 as a dinner salad (topped with a chicken breast or fried tofu)

If you need to prepare this recipe ahead of time, hold the cabbage and the dressing separately and toss just prior to serving.

Alternate Ingredients:

Substitute grapefruit juice for the rice vinegar for a tasty citrus coleslaw

Add sesame seeds (1/4 c) in place of the almonds

Add a 1/2 c of orange sections (peeled with the membrane removed) or 1/4 C dried cranberries.

Wednesday, August 05, 2009

Recipes: Dried Zucchini


Ahhhh Zucchini!

This year we've planted three hills of summer squash (cocozelle, black beauty, and yellow crookneck), so now we are faced with what to do with it all. One of my favorite and most interesting ways to put up the harvest is to make Dried Zucchini Chips. I make mine a little spicy and find that they are a perfect mid afternoon snack since they are full of flavor and crunch (and fiber so WATCH OUT!)

You will need a food dehydrator or you will need to be able to keep your oven at a low temp for a prolonged period of time (I've done this by cycling it on and off).

We bought our dehydrator at a garage sale a few years back, and there seems to be no shortage of them, so keep your eyes peeled.

Here is my recipe for Spicy Dried Zucchini Chips

5-6 medium to large summer squash (zucchini or other soft fleshed squash)
1 cup cold water
2 T Sriracha (A.K.A. Rooster Sauce)
2 T Soy Sauce
1 T garlic powder
1 T salt
2 T toasted sesame oil

Slice the summer squash into 1/4" chips. Mix together all ingredients except the squash. Coat the chips well with the marinade (I often let them soak while I set up the dehydrator).

Lay your chips out in a single layer on the dehydrator trays. My dehydrator will hold about 5-6 medium to large squash worth of chips, but yours may hold more or less.

Turn on the dehydrator and open the vent holes wide. Allow to dehydrate for about 24-36 hours. Rotate the trays several times during this process.

When your chips are completely dry, they should be quite crunchy. Store in a well sealed container. This will yield about 1 - 2 cups of chips.

Friday, July 24, 2009

Around Our House: Daddy Loves His Girls

How I know daddy loves his girls...


This is the spread Scott had laid out for the wiener kids when we got back from swimming lessons. Even I was surprised.

Around Our House: Garden Booty

Big crop of the week.

In spite of the wilt plaguing our tomatoes, we are starting to get a good crop. I think I might try to can a few this weekend.

Our peppers are super happy. I think it may have been the extra fertilizer we tossed in when we planted them. I actually had enough to freeze about a pint. I usually just get a bag started and add to it until it is full. Seems to work well.

Our zucchini and squash are slowly coming, which is good, we are not yet overwhelmed. I baked a delicious zucchini cake last night and we had sauteed squash and zucchini for supper.

We get about two cucumbers a day which seems perfect for daily consumption, however, I will have to buy cucs to do any pickled this year. We used up the rest of our lime pickles, which are a necessity for chicken or tuna salad. I think I'll make the bread and butter pickles out of zucchini again this year, we tried it last year and worked great!

We also picked a giant bucket full of turnips. Hmmm. I have decided to try to make some Middle Eastern Turnip pickles (those funky bright pink pickles they serve at good falafel places). The recipe is fermented so I'll let you know how that goes!

Here are a few pics of our bounty.


Wednesday, July 15, 2009

Recipes: Chicken Ratatouille


Chicken Ratatouille

This is my recipe for a delicious and relatively simple summer meal.

1 whole 5-6 pound chicken cut into parts and skinned (reserve the chicken back and gizzards for stock).
2 cloves garlic crushed or grated
1 medium sized onion diced
2 medium sized zucchini diced
2 medium sized yellow squash diced
2 peppers (any color, chopped)
6 T olive oil
4 T butter
3-4 medium to large tomatoes, peeled, seeded, and chopped
2 T chopped fresh oregano

Heat half of the oil and butter in a heavy covered pot over medium high heat. Add the chicken and garlic. Brown chicken on both sides and turn down the heat and cover. Stir every 5 minutes and cook about 25-30 minutes.

While the chicken is cooking, heat the remaining oil in a large skillet over a medium heat. Add the onions and brown (about 3-5 minutes). Add the zucchini, squash, and peppers cook until tender (another 5 minutes). Add the tomatoes and oregano and set the heat to low. When the chicken thigh is cooked through, add the vegetables to the chicken. Allow to simmer about 5 minutes. Salt and pepper to taste. Serve with chicken quinoa. Serves 4.

Chicken Quinoa

3 cups chicken stock
1 1/2 cups quinoa
1T chopped parsley

Bring stock to a boil (if you have reserved the chicken back and gizzard add 1 chopped onion, or use your vegetable trimmings from the ratatouille, boil for 30 minutes with 6 cups water). Add quinoa. Stir occasionally for 20-25 minutes or until the quinoa is soft and starts to unfurl its white seed curl. Add 1 T chopped parsley. Salt to taste.


NOTE: I like to buy the chicken from a local chicken farmer who raises his chickens free range. Check your local farmers market for home grown chicken. This meal can also use eggplant, if you have it available, or may be stretched with extra veggies. If you are stretching the meal, you may consider picking the chicken from the bone and mixing it in casserole style.

Around Our House: How Our Garden Grows

Let the feast begin!

I just picked the first of our summer veggies. I've gotten a few random tomatoes, peppers, and squash over the last few weeks, but today was the first time I picked enough for a meal!

We've got wilt on the cucumbers and tomatoes again, and we are afraid we will have to deal with it for the next few years. We're monitoring which varieties do the best against it and plan to plant those next year. We have all but completely lost the Poona Kheera cucumbers, but the delikatesse are doing great (so far). I saw a few baby melons and squash today. I just hope they get enough summer to grow fruits.

It's been so cool, we are still picking lettuce, which is good since I forgot to plant chard or collards for summer salads...


Here is the garden a few weeks ago. The pole beans are JUST starting to flower.


The cucumber machine before the Poona Kheeras died.


The greens. And reds. We planted several types of lettuce, red orach, chard, and basil.


The big crop... Guess I don't need to wash the canning jars QUITE yet.

Monday, July 13, 2009

Great photos of my work in a BEAUTIFUL home. Look for the giant personalized fleece ball in the basket and the two sweater balls on the bed.

Design Sponge Blog - http://www.designspongeonline.com/2009/07/sneak-peek-shay-ometz-of-fossil.html

Thursday, July 09, 2009

Around Our House: Freezing Blueberries


Freeze those BLUEBERRIES!

I just put 9 quarts of blueberries in the deep freeze. They were $1.49 a pint at our local Fareway. Whenever you see blueberries at $1.49 or less per pint BUY THEM (especially if you are prone to buying frozen berries for smoothies etc.)! They freeze beautifully! Just put them in a ziplock bag and freeze. Last winter I put up about 8 quarts and wished we had another 8 (for a family of four). We would use them in baking, for smoothies, or as a fruit side for our little ones.

Other berries such as raspberries and gooseberries freeze well too.

Another food I freeze when cheap is peppers. Just chop them and put them in a freezer bag, and you are ready to dump some in chili, or sprinkle a few on a quesadilla.

Later this summer, I will be freezing tomatoes, corn, green beans, squash, and zucchini. I'll let you know when that exciting time comes...

Monday, July 06, 2009

Quick and Easy Blueberry Nectarine Fluff

This is one of my favorite summer recipes. This is my creation based on my undying love of waldorf salad. Increase the fruit for a less fluffy salad.

one pint fresh blueberries (don't even try to use frozen)
6-8 ripe nectarines sliced
one 8 oz package reduced fat cream cheese - softened
one 8 oz tub cool whip
1/2 teaspoon ground cinnamon
1/2 cup chopped pecans or walnuts (optional)

Slice the nectarines and rinse the blueberries and set aside. Using a hand mixer (or whisk) whip together the cream cheese, cool whip, and cinnamon. Combine the fluff with the fruit (and nuts). Serve or chill. Will hold overnight if desired.

For a sweeter salad, whip 1/2 cup honey with the cool whip and cream cheese. Or go grandma crazy and throw in some mini marshmallows!

Serves 6-8

Sunday, July 05, 2009

Choosing a Pincushion

With the assortment of beautiful and unique pincushions available out there, how do you go about selecting one to fit your needs?

Start by determining where and how you will use your pincushion. Do you sew mostly on a machine? Or do you do mostly hand sewing?

Machine sewing typically requires a pincushion that can hold a lot of pins and that is weighted or somehow fixed to your workstation (so it won't slide as you slam your pins down into it). A broad stabbing surface makes it easier to hit the target.

I often have two pincushions in my machine sewing work areas, one where I pin my patterns and the other by the machine. As the pincushion near my cutting and pinning station empties, I swap it for the one that has filled up by the machine. I would beware of any pincushion made inside teacups or other breakable containers for next to the machine (how many times have I knocked my pincushion off as the fabric pulls through the machine). Some people find a small dish with a magnet attached to the bottom next to the machine is the most useful (again, how many of THESE have I knocked over...)

For hand sewing I prefer a smaller pincushion. I typically sew with just a few needles (between 3-5) and keep about five pins on hand in case I need them. The hand sewing station is where the cute little bottlecap pincushions, pincushions inside teacups, and other smaller pincushions are handy. I use one of my own wrapped wool pincushions because they sit nice and flat, are easy to stab, and the wool seems to keep my needles nice. While weighting may still be useful, I have found that I am not nearly as aggressive whilst stabbing as I am hand sewing. If you are a person who embroiders and prefers to keep several needles threaded at the same time, you may still opt for a larger flatter style pincushion.

Another consideration is if you store your pincushion or leave it out. If you need to pack your pincushion up inside your sewing basket, be sure to select one that is a suitable size, and has a firm grip on the pins and needles. Needle books are a great option for inside the sewing basket, as you may leave your needles threaded without getting the thread tangled inside the basket (simply hitch the thread around the needle after you have stuck it into the book).

Pincushions are the perfect gift for the crafty type. A great place to start looking is etsy.com

Here are a few of mine.


Wrapped Wool Pincushion by Handmade Pretties - This is a larger wrapped wool pincushion perfect for handsewing or embroidery. Eye catching and unique this beauty can double as art. Made from recycled wool.


Wrapped Wool Pincushion by Handmade Pretties - This is a smaller wrapped wool pincushion perfect for handsewing. Each one it unique.


Cutest Ever Kitty Pincushion by Handmade Pretties - Pick from several color options, or get one to match your own kitty. Can sit on its butt or belly, perfect for machine sewing station.


Patchwork Needlebook by Handmade Pretties - hold needles or pins on several pages a must for any sewing basket. Made from vintage quilt tops.


Wooly Block Pincushion with Vintage Buttons by Handmade Pretties - Gigantic. Perfect next to the machine, but cute on display. Features vintage buttons and recycled wool.


Here are a few of my favorite pincushion shops on etsy.com


Loose String


Small, Medium, and Large. All beautifully embroidered in a rainbow of colors. Loose String's pincushions would be a welcome addition to my sewing basket anyday.


Feltmates


Super darn cute. Too small for next to my machine, but cute enough to hang out with me in the living room to accept needles while I sew. Comes in several colors, and some of the birds have friends. Be sure to also check out the awesome measuring tapes Feltmates has to offer!


Catherinette


If you seriously *heart* sewing, here's your pincushion... One of several off the wall pincushions.

The Daily Pincushion


A great selection of darling hand embroidered pincushions big and small. Great gifts for the crafty person in your life.

For more wonderfully unique pincushions, check out etsy.com

Thursday, July 02, 2009


Ahhhhh Jello.

What could be more delicious than a jiggling fruity glob of jello? Why jello packed with tuna and mayonnaise of course.

Jellied Tuna with Mayonnaise

1 package lemon Jell-O
1 cup boiling water
1 cup cold water
2 tablespoons vinegar
1 teaspoon salt
1 cup tuna fish, flaked
1 cup peas (fresh-cooked or canned)
2 tablespoons pimento, finely chopped
1/2 cup mayonnaise

Dissolve jell-o in boiling water. Add cold water, vinegar, and salt. Chill. When slightly thickened, fold in remaining ingredients. Blend. Turn into individual molds. Chill until firm. Unmold on crisp lettuce. Garnish with additional mayonnaise. Serves 6-8.

Taken from The Complete Jell-o Recipe Book copyright 1929.

Wednesday, June 24, 2009

CREAMED BRAINS

This is the first installation of a series of recipes that actually make me gag. I have found these in my collection of vintage cookbooks, and hope you enjoy...
Creamed Brains

1 Brain
1 Cup White Sauce
Salt, Pepper, Paprika

Cover brain with slightly salted cold water. Let stand 2 hours. Drain. Cover with boiling water. Boil 20 miniutes. Drain. Chill quickly. Remove the finers. Cut in pieces. Add white sauce. Season to taste. Serve in patty shells. If desired, 1 tablespoon chopped green pepper and 1 tablespoon chopped pimento may be added to give variety in flavor.

4 servings.

The Household Searchlight 1946

Yummers.

Monday, June 22, 2009


We did it. In spite of my desires to glob rocks and jewels into crusty bits of concrete, Sylvia solved our Grotto conundrum by gluing pompoms and stickers onto a shoebox. It's a little more suitable for toddlers and preschool children : ) Even Beatrice (at 2) was able to get into the fun and glue her weight in pompoms.

Here is a shot of our "Pony Grottos" more crap to be glued down soon... I think we may paint a little and squirt on a little glitter glue. Ooo I think I also have a baggie of rhinestones mwwahhahahahah.
Go Grotto!

How does one go about making a Grotto of Redemption? Yesterday, my family went to visit the Grotto of Redemption in West Branch, Iowa. My four year old was completely and utterly inspired. She has been asking me all morning when we will get started on our "Pony Grotto" .

I am thinking plaster or hot glue. But I also have two bags of concrete in the garage... I think we'll start by gathering rocks and sparkles.


The Family amidst the grotto


To say it was impressive was an understatement


Look MA! I'm a statue...


Thursday, June 18, 2009

Easy Pickled Radishes

So due to our overabundance of radishes (we decided to do a "living mulch" this year). We have been seeking new ways to enjoy these sassy garden goodies.

Here is one super quick recipe that is tasty and so easy any knife wielding monkey could do it.

You'll need:
Radishes - probably about a pound or two.
A jar of Classen Pickles (or other dill pickle) minus all the pickles, save the juice

Slice the radishes and put them in the pickle juice. Put the lid on and leave it in the fridge for a week. Good as a Bloody Mary garnish, fun on a salad, or just a yummy spicy snack.
Knock Knock.

Who's There?

Giant Tree Branch.


Sunday, June 14, 2009

Gardening. Ugh. I hate the weeding but love the harvest. Ah well. We just gave the tomatoes a layer of newspaper and compost and forced their unhappy souls into tomato cages.

We picked out first "june bearing" strawberry today. If I didn't have children, I could tell you how it tasted... Looks like I may get one soon.


We've got three mysterious pole bean black holes. No matter what I plant there, they won't grow. I may have to give in and let one of the volunteer tomatoes take over. Our damn okra won't go either... Guess my thumb isn't yet green enough.

Scott is out here right now erecting our bean tee pees. I am admittedly pretty excited. Although, I have a feeling hunkering down amidst bean plants and all of the pollinating pals may not really float my boat anymore. The kiddos will probably like it.


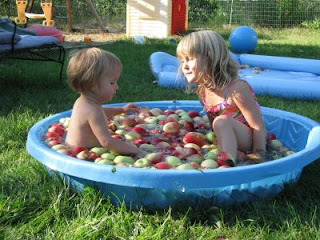
I froze about 2 quarts of rhubarb. I've already made two batches of Rhubarb Jam. We have one frozen apple pie left from last fall's apple extravaganza. (see kiddos sitting in the harvest). And about fifteen jars of Apple Butter... I am excited for the tomatoes. We finally finished all of the tomato chutney and canned toms, and we have nearly eaten all of the sun dried cherry tomatoes.

Grow Baby Grow...