Showing posts with label paper crafts. Show all posts

Thursday, March 01, 2012

Do It Yourself: Paper Easter Eggs


The finished goods can be used as a fun greeting card, or stuffed with money, tattoos, or stickers.

A few years ago, our daughter lost her first tooth on Valentine's Day. Our clever tooth fairy folded her dollar like a heart and made her a tiny little valentine. As luck would have it, her second tooth fell out three days before Easter. She wondered aloud "I wonder if the Tooth Fairy will bring me something for Easter this time?" Wouldn't you know it, in the morning, the Tooth Fairy had created a tiny little egg that held her dollar.

Coming up on Easter again, these little paper eggs are a fun alternative to the cheap plastic eggs we have all come to stuff with candy.


The supplies

What you need:
Scissors
White Glue
Colored Pencils or Markers
4 X 6 Pieces of Cardstock (Index Cards work GREAT!)
Washi Paper Tape (optional)


Decorating the easy way!

If you have Washi Paper Tape, decorating your eggs will be a breeze! Simply lay down layers of tape across your card stock. I am using 4 X 6 index cards, but a similar size piece of cardstock will be fine. If you choose to NOT use the tape, pre-decorate your eggs with markers, colored pencils, or decoupage (let them dry completely before proceeding).


Fold the paper in half and draw or trace an egg shape onto the back with pencil.


Cutting through both halves at once, cut out the egg shape.


On an additional card, trace the egg shape. On the back of one of the decorated eggs, draw a crack.


Hold both eggs together and cut the crack.


Trace the bottom half of the crack on the blank egg shape then carefully draw about 1/4" INSIDE the edge of the outline along the top half of the egg. This is the portion of the card that will be inside the egg, and needs to be smaller along the top edge so it can move freely in and out of the top of the egg.


Decorate the inside piece. I have drawn a chick with an Easter greeting. A vintage Easter drawing pasted to the inside would also be cute.


Cut it out just on the INSIDE of the outlines.


Put a small amount of glue on the back bottom half of the inside piece.


Press one of the bottom halves into the glue and hold firmly.


Along the bottom half of the front, place a thin bead of glue just along the edge of the paper. Leaving most of the bottom front half open will allow for the egg to work as a container. Press the remaining bottom piece into the glue and hold firmly.


On the back of one of the top halves, put a thin bead of glue along the edge. Leaving the center open allows the card to move in and out of the egg.


After the glue has dried...


Assemble your egg! There is probably a right and wrong way to put your egg together, I find holding the top over the bottom to see which way the crack matches up the best makes it easier.


Once the glue has dried, your egg can be used to hold coins, stickers, tattoos, sticks of gum, or in the case of this lucky egg, FIVE DOLLAR BILLS!

Wednesday, March 23, 2011

Do It Yourself: Cardboard City!


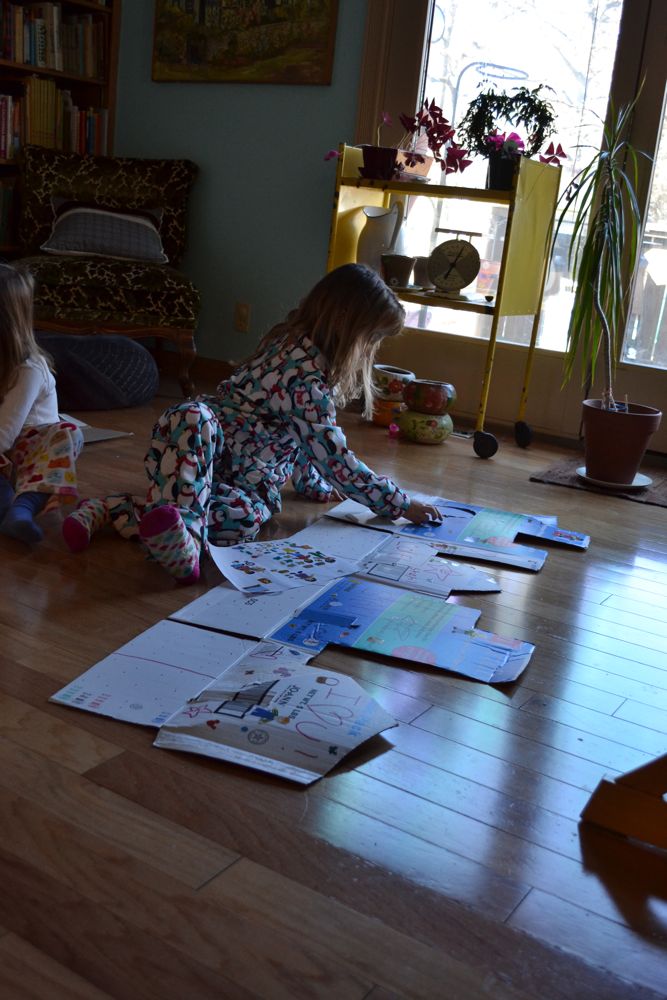
Beatrice playing with the finished product. They also had fun making a circle to keep out tornadoes (yes, they are true midwestern girls).

How many times have you heard "Mom! When are we going to do something fun?" I hear this about ten times a day (ironically it is often on the way home from the zoo or some other epic adventure.) Over Spring Break, our wallets demanded that we find some fun stuff to do at home. So we created cardboard city scapes.

Handmade Pretties uses a lot of 5 pound stuffing boxes, so we chose these as our starting box. Any large box will work.

The first step is to open up the box. Open the flaps on the top and the bottom, then carefully break the seam along the side of the box.

Next, draw your city scape on the main portion of the box (you will be cutting off the top flaps and using the bottom flaps as the supports to make the city stand). Using scissors or a serrated knife, cut out your city. I prefer the serrated knife, since it can be used like a saw, but I have been known to cut deeply into my finger tips while doing this, so be very careful.

Now, draw some doors that sit right along the crease between the main body of the box and the bottom flaps (this way the doors will be at ground level). When you cut out the doors, be sure to leave one side attached if you want the door to open and close.


Beatrice carefully choosing her stickers.

The final step is to give the city scape to your children to decorate. My kids used markers and stickers, but crayons, stamps, paint, and/or glitter glue can also be used.


Sylvia putting on the finishing touches.

Once the kids are done decorating, set up your city and play! The city scapes are a fun addition to blocks and cars, and can be easily folded flat to store. Once the kids are done with them, don't forget to recycle the cardboard!

Monday, March 01, 2010

Do It Yourself: Flutter Butterfly Puppets


One bright and sunny butterfly floating on the breeze.

This is a great project to make while you are waiting and waiting and waiting for spring. These cheerful little butterflies make great puppets or even a fun bouquet. Do this as an afternoon activity or make these as a craft at a birthday party! Perfect for children old enough to use markers up to adults.

Supplies:
basket style coffee filters
food coloring
spray bottle filled with water
washable markers
chenille stems (some traditional style and bump stems)
scissors


All of our supplies ready to go.

1. Beautify the wings (coffee filters). We started by wetting a filter on top of a towel and dropping food coloring onto the filter. You can also draw on a dry filter and them wet it to make the colors run. We hung ours to dry using a hanging laundry carousel. We did this part of the project on one day and finished it the next. Filters should be dry before continuing.

2. Further beautiful your wings if desired. After our dye job dried, we drew patterns and lines on them with markers.

3. pinch the center of the filter, trying to keep an even amount of "wing" on both sides of the pinch.


Pinching the wings into shape.

4. Take one of the bump chenille stems (cut in half) and wrap the thin middle around the pinched wings twice.


Ready to wrap the bump stem around the middle of the wings.


Wrapped and ready for antennae.

4. Take a regular chenille stem cut in half and wrap both ends around a marker to curl. Fold it into a "V" shape.


Curling the antennae.

5. Center the bottom of the "V" on the top of the butterfly's head.


Lined up and ready.

5. Fold the tip over and wrap around the antennae a few times to secure.


Folded over and ready to wrap around the antennae to secure them to the head.

6. At this point you have a butterfly. You can attach them to gifts, or tie a string to suspend. But we like to make butterfly puppets. Taking a whole chenille stem (not the bumpy ones) sneak the tip of it under the center back of the butterfly's body.


Attaching the controls.

7. Twist to secure and you now have a butterfly puppet. Hold the far end of the stem and allow your butterfly to gently bob and sway with the breeze. If your stem gets bent, you may need to replace it. Gather together a handful of butterflies for a bright and cheerful bouquet!


Fly little friend!

Project designed by Lara Newsom of Handmade Pretties

Monday, February 15, 2010

Etsy Favorites: 4 Season Cone Gnomes from CutesyPoo


I don't know about you, but here in the land of the perpetual snow, I would like the spring gnome to start pulling his weight. These cute little guys arrive in the form of a .pdf file that you can print from home and assemble. At $1.99 I almost don't even have to think about it! Cutesypoo Toys also makes similar gnomes in fabric, pre-assembled.

I picture these up on a shelf in the girls' room or peek out from behind a plant. What about you?

Monday, February 08, 2010

Do It Yourself: Valentine's Day Crackers


The finished goods, ready for delivery.

Oh sure Valentine's Day is a corporate creation to get us to buy each other satin underwear and boxes of chocolate, but it is also a great time to whip up something delightfully pink, fill it with chocolate, and give it to the people you love (or even like a little).

This Valentine's Day, my girls and I made Valentine's Day crackers filled with chocolate kisses for their class. This project is relatively simple. Children over 8 should be able to finish this project with little assistance, while younger kids will need help, but will still enjoy filling the tubes with goodies.


Our work station

Materials
Scotch Tape
Cardstock cut into 3" x 4.25" pieces
Tissue paper cut into 10" x 8" pieces (the thin gift wrapping type is best)
Scissors
thin ribbon or yarn cut into 10" pieces
Medium to large stickers
Kisses or other small candies or treats


Our supplies ready to go. I use my paper cutter to cut down the tissue and cardstock to size.

Roll the cardstock into 3" tubes. Overlap the edges of the cardstock about 1/2" and tape.

With the tube on the 8" side of the tissue paper, roll the tissue around the tube. Twist one end closed, and stick the sticker on the seam of the tissue (little ones are great at sticking the stickers). Tie a ribbon on the twisted end.


Rolling the tube in tissue.


Before we have twisted the end.

Check that the tissue paper opening is clear into the tube, and insert two kisses (or other small goodies). Twist the other end closed and tie with a ribbon.


One end twisted and tied and ready to be filled.


Beatrice (2) filling the tubes with kisses for her friends.

A few years back when making stamps for my business, I had stamps made of my girls' names. The kids' schools want each valentine to only be signed, not individually addressed, so we use the stamps to sign the valentines.

For our close friends and family, we will be making larger versions of this project filled with more treats and a few pics of the girls. If you have a stash of cardboard tubes from toilet paper or paper towels, you can use those, otherwise create larger cardstock tubes.

Happy Crafting!